
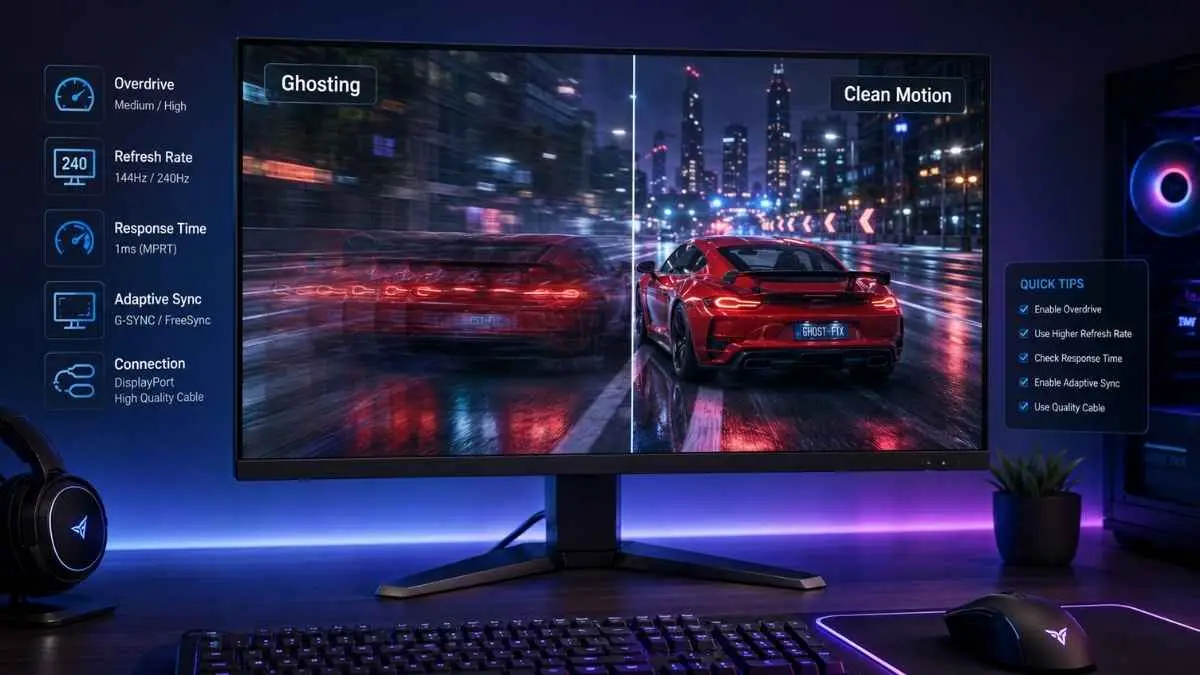

You sit in your gaming chair, tracking a target around a corner. The image smears. A faint, blurry double trails behind the crosshair.
You have seen it before, that is monitor ghosting, and the question of how to fix monitor ghosting is one of the most frustrating in PC gaming. In most cases, monitor ghosting comes down to slow pixel transitions, an unsuitable overdrive setting, or the inherent response characteristics of the panel. Outdated drivers, incorrect refresh-rate settings, and connection problems can create other display artifacts that look similar, so the first step is confirming that you are actually dealing with ghosting.
A typical gaming monitor’s gray-to-gray (GtG) response time can range from 1 ms to over 10 ms, depending on the panel type. Even budget monitors often claim a 1 ms response time, but real-world performance varies significantly.
Let us start with the most important step: confirming you are actually dealing with ghosting and not a different issue entirely.
Quick Answer: The 60-Second Ghosting Fix
To fix monitor ghosting, open your monitor’s on-screen display (OSD) and find the Overdrive or Response Time setting. Start with a middle option such as “Normal” or “Medium,” then compare the lower and higher settings. Too little overdrive can leave dark trails, while too much can create bright inverse ghosting. Keep the setting that produces the cleanest motion with the least visible trailing or bright coronas.
This controls how aggressively pixels are driven to their target color. Setting it to “Extreme” or “Fastest” forces too much voltage into the pixels, causing severe inverse ghosting (bright halos). Always test your changes using the Blur Busters UFO Motion Test to find the best balance between normal ghosting and inverse ghosting for your monitor.
How Do You Know If It’s Really Ghosting?
Ghosting is a pixel response problem, not a frame-rate issue. You can confirm it with a simple browser-based test that shows you exactly what type of artifact you are seeing.
The Blur Busters UFO Motion Test is the standard diagnostic tool for motion clarity. It runs in any browser and displays a moving UFO at different speeds. According to the team at Blur Busters, which has been the leading authority on motion clarity in displays for over a decade, this test isolates pixel response time from other variables. The key is knowing what each artifact looks like.
Diagnostic Reference Table
Artifact What You See What Causes It
Standard Ghosting A faint, dark, repeating echo trailing the UFO Slow pixel response (pixels cannot keep up)
Inverse Ghosting (Overshoot) A bright white or colored corona on the leading edge Overdrive set too high, causing pixels to overshoot
Screen Tearing A horizontal split where the UFO looks misaligned Frame rate does not match the monitor’s refresh rate
Motion Blur (Low FPS) The UFO looks soft and indistinct, with no clear trail The GPU cannot deliver enough raw frames
At slower UFO speeds (around 960 pixels per second), ghosting is easiest to spot. At higher speeds, all monitors show some blur, so do not confuse that with a hardware problem.
If you see a clear dark echo pattern, you have standard ghosting . You need to adjust your overdrive settings.
If you see a bright white flash on the leading edge, you have inverse ghosting . Your overdrive is too aggressive.
If you see a horizontal split, you have screen tearing , not a pixel response issue.
For screen tearing, enabling G-Sync or FreeSync is the solution. For ghosting, you need to adjust your overdrive setting, which is what we cover next.
Step 1: Adjust Your Overdrive Setting
The overdrive setting controls how much extra voltage your monitor pumps into each pixel to make it switch colors faster. Finding the right level is the single most effective fix for ghosting, but the wrong level makes it worse.
Every monitor manufacturer calls this setting something different inside the on-screen display (OSD) menu, usually under a “Game” or “Gaming” tab:
ASUS: Trace Free (usually found in the Gaming section)
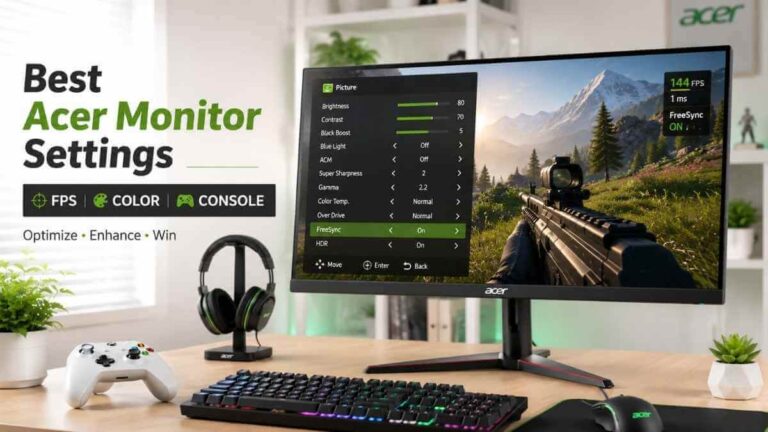
Acer: Overdrive or Response Time
LG: Response Time (Off, Normal, Fast, Faster)
Samsung: Response Time (Standard, Faster, Fastest)
BenQ: AMA (Advanced Motion Acceleration)
Dell: Response Time (Normal, Fast, Extreme)
MSI: Response Time (Normal, Fast, Fastest)
Start with the lowest available setting, run the UFO test, and note what you see. Move up one level, run the test again, and keep going until you reach the highest setting.
Overdrive Calibration Guide
Overdrive Level What to Expect Keep or Change?
Off / Low Noticeable trailing behind the UFO, especially at high speeds Change it
Normal / Medium Much less trailing, UFO looks mostly clean This is usually the winner
Fast / High Very clean UFO, possibly slight overshoot on the leading edge Keep if no overshoot
Extreme / Fastest White or colored corona ahead of the UFO, inverse ghosting Change it immediately
There is no universal best overdrive level for every monitor. A middle setting is usually the safest starting point, but the cleanest option depends on the monitor model, refresh rate, frame rate, and overdrive tuning. Test each level at the refresh rates you actually use, because a setting that looks clean at 144Hz may create noticeable overshoot when the monitor drops closer to 60Hz.
If you use variable refresh rate technology like G-Sync or FreeSync, some monitors also offer a “VRR overdrive” setting. This dynamically adjusts the overdrive voltage based on your current frame rate. If your monitor has this option and you use adaptive sync, enable it to help maintain clean motion across different frame rates.
Note: Many high-end monitors from ASUS and Acer have excellent overdrive implementations that work across a wide range of refresh rates. You can reference our dedicated guide on proper settings if you want a more tailored starting point.
What If You Can’t Find the Overdrive Setting?
Some budget monitors lack an overdrive option entirely. If your OSD has no such setting, your monitor is running at its fixed native pixel response. In that case, the ghosting you see is a hardware limitation, and you cannot fix it through software. We cover that scenario in Step 5.
Why “Extreme” Overdrive Makes Ghosting Worse (Inverse Ghosting)
Setting your overdrive to “Extreme” pushes too much voltage to the liquid crystals, causing them to overshoot their target color and create a bright artifact called inverse ghosting.
Think of it like braking a car:
Normal overdrive is like applying the brakes smoothly to stop exactly at a line.
Extreme overdrive is like slamming the brakes so hard that the car skids past the line, then jerks back.
The skid past the line is the overshoot, and the jerk back is the correction. The result is a bright white or colored edge that appears ahead of moving objects.
This artifact is actually more noticeable and more distracting than standard ghosting. Standard ghosting is a faint blur that blends into the background, whereas inverse ghosting is a bright, sharp halo that draws your eye, creating a shimmering effect in fast-moving scenes that makes games look like they are running under a strobe light.
Response time specifications are often measured using optimal conditions that do not reflect real-world use. A monitor might achieve its advertised 1ms GtG only at the Extreme overdrive setting, but that setting introduces overshoot that makes the image look worse. The “1ms” number becomes pure marketing rather than practical performance.
Overdrive tuning is about finding the voltage sweet spot where your monitor’s liquid crystals transition fast enough without overshooting. That sweet spot is almost never at the maximum setting.
Some newer monitors, particularly those using LG’s Nano IPS or Samsung’s fast VA panels, have smarter overdrive circuitry that can handle higher voltage without as much overshoot. High-end models include dynamic overdrive that adjusts automatically based on frame rate and content type. The highest setting should only be used when the UFO test and actual gameplay show no obvious bright corona, color overshoot, or distracting inverse ghosting.
Step 2: Enable G-Sync or FreeSync to Remove Screen Tearing
Enabling G-Sync or FreeSync can remove screen tearing and create smoother frame delivery, making any remaining motion artifacts easier to identify. These technologies do not directly fix monitor ghosting because they control when frames are displayed rather than how quickly individual pixels change color.
Tearing and ghosting can appear during the same gaming session, especially when your frame rate moves across a wide range. Removing the tearing first gives you a cleaner image, which makes it easier to judge whether the remaining trail comes from the monitor’s pixel response or from another source.
How to Enable Adaptive Sync Properly
Open your GPU control panel (NVIDIA Control Panel or AMD Adrenalin Software).
Navigate to the display settings section.
Enable G-Sync or FreeSync for the appropriate monitor.
Open your monitor’s OSD and enable Adaptive-Sync or FreeSync if the option is available. Then enable G-Sync through NVIDIA’s software or FreeSync through AMD Software.
Restart the game and check its motion normally. Then close the game and run the UFO test separately to compare your overdrive settings under controlled conditions.
Once adaptive sync is active, cap your frame rate to about 3 to 5 frames below your monitor’s maximum refresh rate:
For a 144Hz monitor , cap your frames at 141 FPS .
For a 240Hz monitor , cap your frames at 237 FPS .
Keeping the frame rate slightly below the monitor’s maximum refresh rate helps the game stay within the supported VRR range more consistently. The ideal cap can vary depending on the game, GPU, V-Sync setting, and frame limiter you use.
Stable frame pacing usually feels cleaner than large frame-rate swings, but this does not directly fix monitor ghosting. It only improves frame delivery; ghosting caused by slow pixel transitions still needs to be addressed through overdrive adjustment or the limitations of the monitor panel.
Step 3: Verify Your Refresh Rate and Rule Out Driver Problems
Outdated or corrupted GPU drivers can cause flickering, stuttering, graphical corruption, black screens, or missing display modes that may be confused with monitor ghosting. Drivers are not normally responsible for true pixel-response ghosting, but checking them is still worthwhile when the problem appears suddenly or when the correct resolution and refresh rate are unavailable.
NVIDIA and AMD regularly release driver updates to fix bugs, improve game compatibility, and address display-related problems. If your drivers are outdated or the artifact appeared after a recent update, check for a newer version or reinstall the current driver before assuming that the monitor panel is faulty.
How to Update Your Drivers
NVIDIA: Open the NVIDIA App, select the Drivers section, and check for the latest Game Ready or Studio Driver. You can also download the appropriate driver directly from NVIDIA.
AMD: Open AMD Adrenalin, go to the “Driver & Software” tab, and check for updates. Or download from the AMD website.
After updating, restart your PC. Then run the UFO test again.
Verify Your Windows Refresh Rate
Windows can sometimes run a high-refresh monitor at 60Hz when the correct display mode has not been selected. This reduces motion smoothness and increases perceived blur, although it does not necessarily mean that the monitor has true pixel-response ghosting.
To check:
Right-click the desktop and select Display Settings .
Scroll down to Advanced Display .
Look for Choose a refresh rate and set it to your monitor’s maximum, usually 144 Hz, 240 Hz, or 360 Hz.
If a 144Hz monitor is running at 60Hz, you are not receiving the smoother motion that the display is capable of producing. Select the highest refresh rate officially supported by your monitor, resolution, GPU port, and cable, then run the UFO test again. This may reduce perceived blur, but it will not completely remove ghosting caused by slow native pixel transitions.
What About Corrupted Drivers?
Sometimes a driver update goes wrong, or a previous uninstall leaves behind corrupted files. In that case, use a tool like Display Driver Uninstaller (DDU) to remove the old driver completely, then install the latest one fresh. This is a more advanced step, but it can fix stubborn artifacting issues.
Step 4: Test Your Display Cable
A bad or bandwidth-limited cable can cause signal degradation that looks like ghosting. If your cable cannot handle the resolution and refresh rate you are running, the signal gets compressed, and motion artifacts appear. This is more common than most people think. Not all cables are the same, even if they look identical.
HDMI vs. DisplayPort Bandwidth Standards
Connection Standard Maximum Link Bandwidth Typical Gaming Capability Important Limitation
HDMI 1.4 10.2Gbps Commonly used for 1080p high refresh; some 1440p modes may be possible Exact refresh rate depends on the monitor, GPU, timing, and color settings
HDMI 2.0 18Gbps Commonly supports 1440p at high refresh rates and 4K around 60Hz Higher color depth or chroma settings increase bandwidth requirements
HDMI 2.1 Up to 48Gbps Supports demanding modes such as 4K 120Hz on compatible hardware Not every HDMI 2.1 device implements the full 48Gbps bandwidth
DisplayPort 1.2 21.6Gbps Commonly supports 1440p at 144Hz or higher and 4K around 60Hz Exact support varies with timing and color depth
DisplayPort 1.4 32.4Gbps Supports high-refresh 1440p and high-refresh 4K, often using DSC GPU and monitor must both support the required DSC mode
DisplayPort 2.0 / 2.1 Up to 80Gbps Designed for very high resolutions and refresh rates Actual capability depends on the UHBR mode implemented by the hardware
If your cable or connection cannot reliably handle the selected resolution and refresh rate, you are more likely to experience flickering, signal dropouts, colored sparkles, image corruption, or an unavailable refresh-rate option rather than true monitor ghosting. Display Stream Compression does not activate simply because a cable is weak; it only works when the GPU and monitor both support and negotiate it.
How to Test Your Cable
Use the cable supplied with the monitor or a certified replacement rated for your required resolution and refresh rate.
Confirm that both the GPU output and monitor input support the display mode you are trying to use.
Try another cable and another port on the GPU or monitor.
Inspect the connectors for bent pins, damage, loose contact, or severe cable bends.
Temporarily lower the resolution or refresh rate. If signal errors disappear, the original connection may not be handling the selected mode reliably.
If changing the cable removes the artifact, the problem was probably connection-related rather than true pixel-response ghosting.
If changing the cable removes the artifact completely, you have probably identified a connection problem rather than true pixel-response ghosting. Use a certified cable that supports the resolution, refresh rate, color depth, and connection standard required by your specific monitor and graphics card.
Step 5: Understand Your Panel Type’s Limitations
If you have tried every overdrive setting, updated drivers, swapped cables, and enabled VRR, the ghosting may be a hardware limitation of your monitor’s panel technology. Not all panel types handle motion the same way.
The panel type determines how fast pixels can transition, and some panel types are inherently slower than others.
How Each Panel Type Handles Ghosting
Panel Type Ghosting Tendency Best For Key Limitation
TN Low ghosting, fast response Competitive FPS Poor colors and viewing angles
IPS Moderate ghosting, generally good response All-around gaming Older IPS panels can be slow
VA Higher ghosting, especially in dark transitions Immersive single-player games Black smearing on dark content
OLED Virtually no ghosting, instant pixel response Premium gaming Risk of burn-in, high cost
The VA Panel Black Smearing Problem
Many VA monitors show more visible smearing during dark-to-dark transitions, although the severity varies significantly between models. This is a known limitation called black smearing . VA pixels are slow to transition from dark to dark. When a dark object moves across a dark background, you see a smeared trail.
This is not a setting you can fix through software, but you can minimize its effects using these tricks:
Lower the overdrive setting slightly, as some VA panels overshoot badly at high settings.
Increase the brightness or black level (such as using a Shadow Boost or Black Equalizer setting), which reduces the depth of dark transitions and makes smearing less visible.
Accept that this panel type has this limitation. For competitive FPS games, a VA panel may not be the best choice.
What About IPS and TN?
Modern IPS panels, especially those labeled “Fast IPS” or “Nano IPS,” handle motion very well. Older IPS panels, however, can have slower pixel response. If you have an older IPS monitor, you may be seeing its native limitations.
TN panels can still deliver fast response among LCD technologies, but modern Fast IPS monitors may also perform extremely well, while OLED generally provides faster pixel transitions than either.
When to Consider a Different Panel Type
If ghosting bothers you and you have exhausted all settings, it may be time to look at a different panel technology entirely.
OLEDoffers the best motion clarity, with essentially instant pixel response (0.03ms). But it is expensive and has burn-in risks. Fast IPS is a good middle ground, offering excellent motion clarity with better colors than TN.
Final Checklist: How to Fix Monitor Ghosting
Monitor ghosting is usually easiest to fix by adjusting the Overdrive or Response Time setting and testing each level with the Blur Busters UFO Motion Test. Start with a middle setting, avoid aggressive overshoot, and make sure Windows is using the correct refresh rate.
G-Sync and FreeSync can remove tearing, but they do not directly fix slow pixel transitions. Driver updates and cable checks are useful for ruling out other display problems. If ghosting remains after every adjustment, the panel itself may be the limitation, especially on VA monitors with slow dark transitions.
If you’ve decided it’s time to replace the panel entirely, our gaming monitor recommendations break down options by panel type and refresh rate.
Frequently Asked Questions
Can monitor ghosting be completely fixed?
It depends on the cause. Poor overdrive settings, an incorrect refresh rate, or inverse ghosting can often be reduced significantly. However, ghosting caused by slow native pixel transitions or VA black smearing may not disappear completely.
Does a higher refresh rate reduce ghosting?
A higher refresh rate improves motion smoothness and can reduce perceived blur, but it does not automatically make slow pixels respond faster. Pixel response time and overdrive tuning still determine how much visible trailing remains.
Can HDMI or DisplayPort cables cause monitor ghosting?
A faulty or unsuitable cable usually causes flickering, signal loss, sparkles, corruption, or missing refresh-rate options rather than true pixel-response ghosting. Testing another certified cable can help rule out connection-related artifacts.
Why does the fastest overdrive setting look worse?
The fastest overdrive setting may push pixels beyond their target color, creating bright halos called inverse ghosting. A middle or moderately fast setting often provides a cleaner balance between dark trailing and overshoot.
Is ghosting worse on VA monitors?
Many VA monitors show slower dark-to-dark transitions, which can create visible black smearing in dark games. The severity depends on the specific panel and overdrive tuning, so not every VA monitor performs the same way.
Does G-Sync or FreeSync fix ghosting?
No. G-Sync and FreeSync reduce screen tearing and improve frame delivery by matching the refresh rate to the GPU output. They do not directly change the monitor’s pixel-response speed.



Leave a Reply